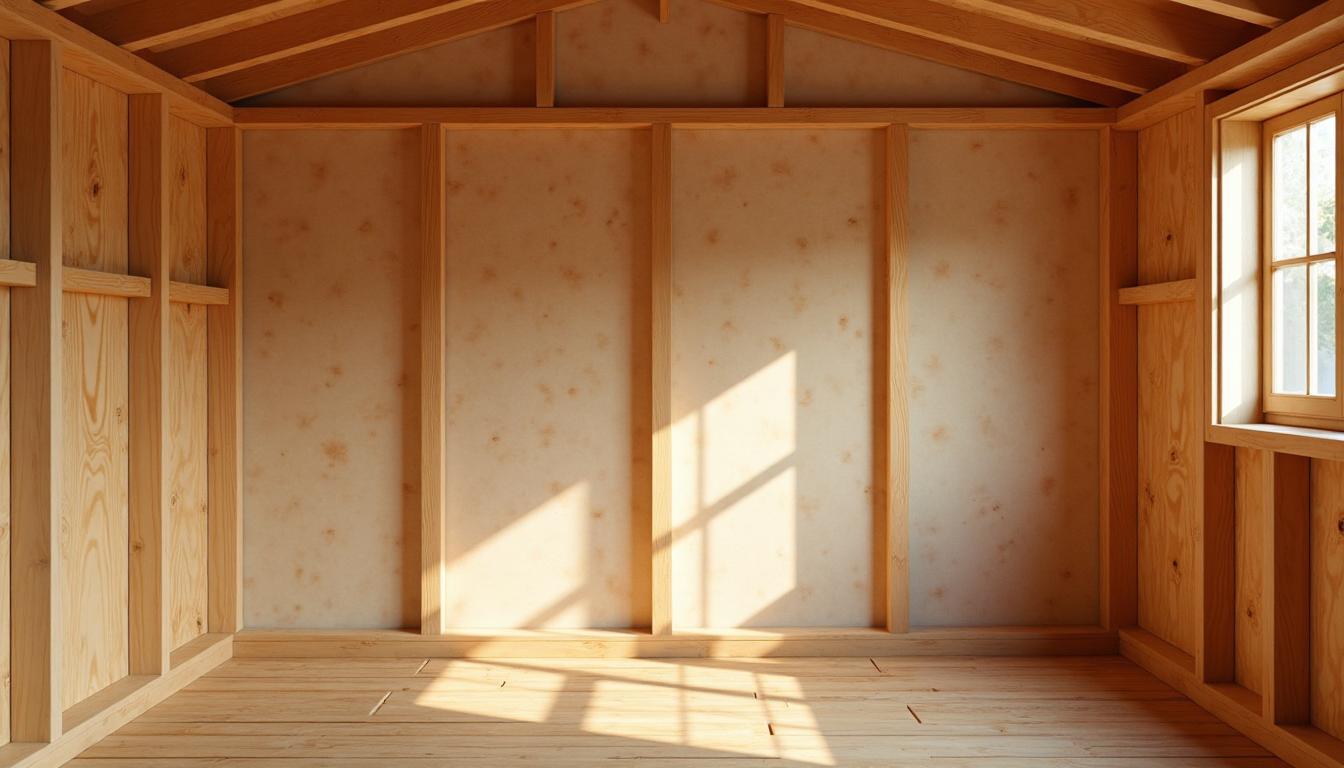
Sheds, garages, workshops, and animal shelters all lose heat the same way a house does — just with thinner walls and bigger gaps. Whether you want a workshop you can use in January, a garage that isn’t an oven in July, or a shelter that stays livable for animals year-round, insulating a backyard outbuilding is one of the highest-return DIY projects you can take on. It’s also one of the easiest to overspend on. Here’s a practical, experience-based breakdown of what delivers real comfort and what’s money down the drain.
Start with air sealing, not insulation
The cheapest upgrade is almost always sealing gaps around doors, windows, and roof edges. Insulation only works if the building is reasonably airtight first; otherwise you’re insulating around a hole. Caulk, weatherstripping, and a can of expanding foam at the obvious leaks come before anything else — and they often make a bigger comfort difference per dollar than the insulation itself. Hold a hand near the door frame on a windy day; if you feel a draft, that’s your first project. A roll of weatherstripping and two tubes of caulk cost less than a pizza and routinely cut the worst of the heat loss.
Understand how the building loses heat
Heat escapes through conduction (straight through walls and roof), air leakage (gaps and cracks), and radiation (the summer sun baking your roof). Different climates call for different priorities. In cold regions, conduction and air leakage dominate — insulate and seal. In hot regions, radiant heat through the roof is the bigger enemy, and a reflective barrier often beats thick wall insulation. Diagnosing which problem you actually have saves you from solving the wrong one and spending on insulation that barely moves the needle.
Choosing a material
Rigid foam board (XPS or polyiso) is the workhorse for outbuildings: high R-value per inch, moisture-resistant, and easy to cut and fit between studs. Fiberglass batts are cheaper but sag over time, absorb moisture, and become nearly useless when damp — and rodents love nesting in them. For most DIY shed and garage projects, a single layer of foam board on the walls and a thicker layer on the ceiling is the best value. Spray foam seals and insulates in one step and has the best R-value per inch, but it costs several times as much and is hard to redo if you change your mind. Mineral wool is a middle option — more moisture- and fire-resistant than fiberglass, cheaper than spray foam.
A simple R-value rule of thumb
You don’t need house-level R-values for a detached structure. R-13 to R-15 in the walls and R-19 in the ceiling is plenty for cold climates; milder zones can go lighter. Going higher in a small building hits diminishing returns fast, because most heat escapes through gaps and the roof long before the wall insulation becomes the limiting factor. Spend your money sealing and insulating the ceiling before you over-build the walls — heat rises, and the roof is where you lose it.
Tools and a realistic budget
For a basic shed or garage you’ll need a utility knife or fine-tooth saw, a tape measure, a caulk gun, construction adhesive or cap nails, and a roll of foil tape for sealing foam-board seams. A typical 10×12 shed runs a few hundred dollars in materials for foam board and sealing supplies — well under what a single winter of a space heater fighting an uninsulated building would cost you in electricity. Buy one extra sheet of foam board; you’ll waste less time and the offcuts fill awkward gaps.
A weekend approach
Day one: air-seal everything — caulk the gaps, weatherstrip the door, foam around penetrations, and tape the seams. Day two: cut and fit the foam board to the walls and ceiling, friction-fit between studs and rafters, then tape the joints. If you’re finishing the space, add a layer of plywood or OSB over the foam to protect it. Most single-room outbuildings are a two-day job for one person with a helper for the panels.
When the building houses animals, the rules change
Heated workshops and animal shelters are not the same project. A structure with living creatures generates constant humidity, and trapping that moisture behind insulation causes mold, rot, and ammonia buildup. If you’re insulating a coop, kennel, or barn stall, ventilation has to be designed in alongside the insulation. This chicken coop insulation guide explains the moisture math clearly — when insulation genuinely helps, when it backfires, and what R-value actually makes sense for a small animal structure. The same principles apply to any building where you keep livestock: solve airflow first, then insulate, and never seal a living space airtight.
When not to bother
If you only use a space a few times a month, or you live in a mild climate, full insulation rarely pays back. A reflective radiant barrier on the roof to cut summer heat is often the smarter, cheaper move than insulating the whole envelope. Match the investment to how you actually use the building — there’s no prize for over-engineering a shed you visit twice a season.
Common mistakes to avoid
The big ones: insulating before air-sealing, using fiberglass in a damp building, skipping any vapor consideration, leaving foam board exposed where it can be damaged or burn, and forgetting that any heated space needs a way for moisture to escape. Each of these turns a comfort upgrade into a mold or safety problem within a season or two.
Bottom line
Seal first, choose moisture-resistant materials, keep your R-values realistic, match the project to how the building is used, and never insulate a structure with animals without solving ventilation at the same time. Done right, a weekend and a couple hundred dollars can transform how an outbuilding performs year-round.


Leave a Reply